In the world of 3D, blender is the undisputable king. It is a swiss knife combining 3D modeling, shading, texture paint, animation and more all in one program. The downside of having so many options however is that new users can sometimes feel overwhelmed or lost, as even veterans normally don’t know all shortcuts and the interface isn’t the most friendly.
For this, I’m making this post, listing 30 tips for blender users to help you better understand it and all its tools.
- Quick Preview of Lighting & Materials
Quickly preview your scene by switching to Material Preview mode. Press Z to open the shading pie menu and select Material Preview, or click the sphere icon in the top right of the viewport. - Workspace Customization
Rearrange editors or install community themes (visit extensions.blender.org/themes) for a personalized workflow. - Mastering the Outliner
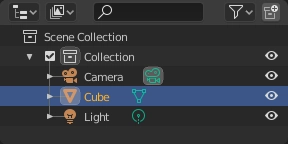
Use the Outliner(i.e. the list of objects in a scene) to organize objects, collections, and scenes efficiently. - Efficient Duplicating
Press Shift+D to duplicate objects while preserving their properties. - Accessing the Add Menu
Press Shift+A to open the Add menu, then start typing in the search box to locate the desired operator quickly. - Pinning Essential Add-ons
Pin frequently used add-ons to the header for quick access. - Precision View Navigation
To orbit around the 3D cursor, first set the pivot point to the 3D Cursor in Preferences (under Navigation), then use the Middle Mouse Button (MMB) drag to rotate the view. - Unlocking the Potential of Python
Use Python scripting to automate tasks and create custom tools within Blender. - Context-Sensitive Menus
Right-click to bring up a context-sensitive menu. - Beveling Edges
Press Ctrl+B to activate the Bevel tool for smoothing out hard edges. - Auto Smooth Normals
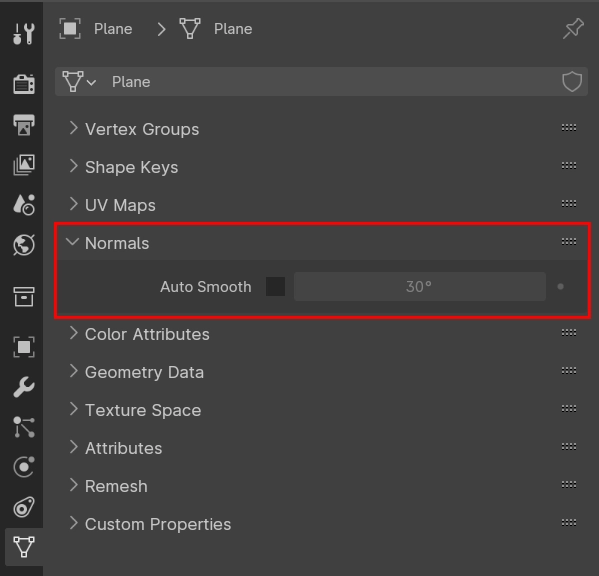
Enable Auto Smooth in Object Data Properties > Normals. Assign a shortcut via the Keymap Editor for quick toggling. - Incremental Backups
Save incremental backups manually or use an add-on to ensure progress tracking. - Edge Fillet for Detailed Modeling
Use the Bevel (Ctrl+B) tool with more segments for a fillet-like effect. Consider installing a fillet add-on for advanced control. - The Versatility of the ‘N’ Panel
Press N to toggle the Sidebar for quick access to context-sensitive settings. - Custom Cursor Placement
Place the 3D cursor using Shift+Right-Click (or Left-Click, depending on selection settings). Assign a shortcut in the Keymap Editor for precision control. - Switching to Vertex Paint Mode
Press Ctrl-Tab to bring up the mode pie menu, then select Vertex Paint. - Independent Editor Zoom
Most editors support Mouse Wheel zoom. Assign a custom shortcut for independent zooming if needed. - Precise Object Movements
Press G (grab) and hold Shift for slow, precise movements. Use numerical values for exact positioning. - Unwrapping Geometry
In Edit Mode, press U to open the UV Unwrap menu. - Custom Menus for Efficiency
Create custom pie menus using add-ons like Pie Menu Editor and assign shortcuts for frequently used functions. - Special Paste Functions
Use the Copy/Paste Attributes add-on to transfer vertex groups or weights efficiently. - Linked Duplicates
Press Alt-D to create linked duplicates that share the same data. - Safe Frame Navigation
Enable Safe Margins in the Viewport Display settings under the Camera properties. - Object Export
Export objects via File > Export. Assign a shortcut in the Keymap Editor for faster access. - Isolate Objects
Press Numpad / to enter Local View, which hides all unselected objects. - Linking Materials
Select the source object, then others, and press Ctrl+L to link materials. - Flip Normals
Flip normals using Mesh > Normals > Flip. Assign a shortcut in the Keymap Editor if needed. - Recalculate Normals
Use Mesh > Normals > Recalculate Outside to correct normals direction. - Transform Orientation
Change transform orientation via the Orientation menu in the 3D Viewport header. Assign a custom shortcut if frequently used. - Redo Last Action
Press Shift+Ctrl+Z to redo the last undone action.
Final Notes
Blender is an incredibly powerful tool, but mastering it takes time and practice. With the right shortcuts, workflow optimizations, and a deeper understanding of its features, you can work more efficiently and unlock the full potential of the software. The tips shared here aim to make your Blender experience smoother, whether you’re a beginner or an experienced user looking for new tricks. Keep exploring, experimenting, and refining your skills—there’s always something new to learn in Blender!
Like my content? Support me with a tip!