Photoshop is the industry standard for image editing(unfortunately), but not everyone is happy with the company behind it. Fortunately, GIMP (GNU Image Manipulation Program) is a powerful, free, and open-source alternative that can be customized to closely resemble and function like Photoshop.
With the right themes, plugins, and settings, you can transform GIMP’s interface and workflow to feel familiar to Photoshop users—without sacrificing functionality or creativity.
What is PhotoGIMP?
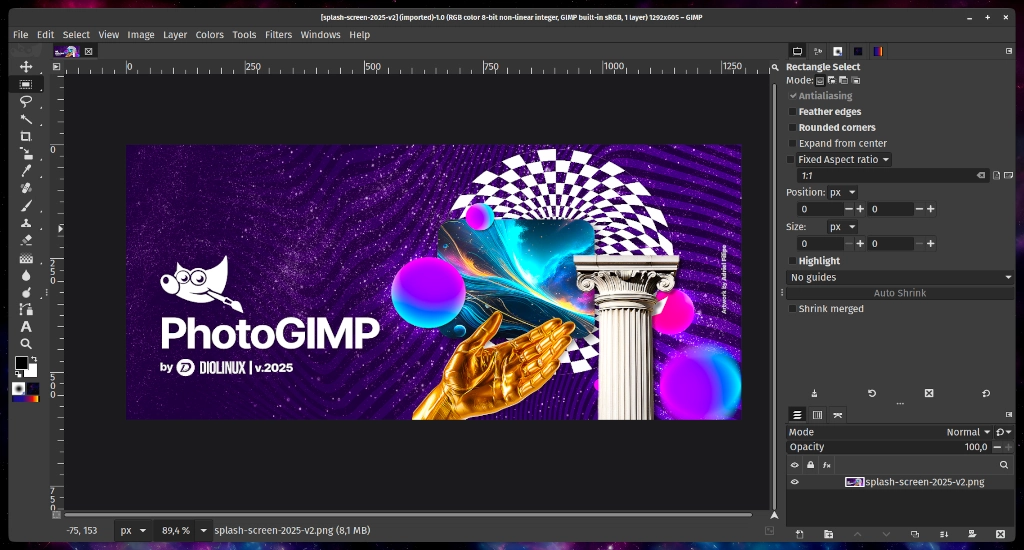
PhotoGIMP is a simple but highly effective patch created by the Diolinux team. It doesn’t modify the core software of GIMP; instead, it replaces GIMP’s default configuration files to instantly apply a custom layout, new tool icons, a customized splash screen, and—most importantly—Photoshop’s default keyboard shortcuts.
What Changes After Installation?
- Tool Organization: Tools are grouped and positioned to mimic the classic Adobe Photoshop workspace.
- Keyboard Shortcuts: Standard Photoshop hotkeys are applied (e.g.,
Vfor the Move tool,Cfor Crop,Mfor Marquee,Pfor Path/Pen). - New Filters & Fonts: It comes pre-packaged with several popular Python scripts (like “Heal Selection”) and extra fonts.
- Splash Screen: A sleek custom startup image replaces the default GIMP mascot.
Installation Guide
To get started, you will need to download the correct release for your operating system from the PhotoGIMP GitHub page. Before applying the patch, you must open GIMP at least once and close it so the software can generate its default configuration folders.
Linux (Flatpak)
Step 1: Backup your current settings (Optional)
If you want to keep your current GIMP settings, open your terminal and run:
cp -r ~/.config/GIMP/3.0 ~/GIMP-3.0-backup
Step 2: Install the Patch
- Ensure GIMP is installed via Flathub, run it once, and close it.
- Download the latest PhotoGIMP for Linux
.zipfile. - Extract the
.zipfile directly into your home folder (~). - Press
Ctrl + Hin your file manager to view hidden folders. - Confirm that the extracted files have merged into your
~/.configand~/.localfolders. - Choose “Replace” or “Overwrite” when prompted by your system.
- Open GIMP to see your new layout.
Windows
Step 1: Backup your current settings (Optional)
- Press
Windows + Rto open the Run dialog. - Type
%APPDATA%\GIMPand press Enter. - Copy the entire
3.0folder to a safe location, like your Desktop.
Step 2: Install the Patch
- Ensure you have GIMP installed from the official website, run it once, and close it.
- Download the latest PhotoGIMP for Windows
.zipfile. - Extract the contents of the zip file to your Desktop.
- Open the extracted folder and copy the
3.0folder inside it. - Press
Windows + Rto open the Run dialog. - Type
%APPDATA%\GIMPand press Enter to open GIMP’s settings folder. - Paste the copied
3.0folder here. - Select “Replace the files in the destination” when prompted.
- Open GIMP to see your new layout.
(Alternative for Windows: You can also install PhotoGIMP via Chocolatey if you prefer using a package manager).
macOS
Step 1: Backup your current settings (Optional)
- Open Finder.
- Press
Cmd + Shift + Gto open “Go to Folder”. - Type
~/Library/Application Support/GIMPand press Enter. - Copy the entire GIMP folder to your Desktop for safekeeping.
Step 2: Install the Patch
- Ensure GIMP is installed, run it once, and close it.
- Download the latest PhotoGIMP for macOS
.zipfile. - Extract the contents of the zip file to your Desktop.
- Open the extracted folder and copy the
3.0folder inside it. - Open Finder, press
Cmd + Shift + G. - Type
~/Library/Application Support/GIMPand press Enter. - Delete any old
2.10folders if you see them to avoid future conflicts. - Paste the copied
3.0folder inside the GIMP folder. - Select “Replace” or “Merge” when prompted.
- Open GIMP to see your new layout.
Enjoy!
Like my content? Support me with a tip!