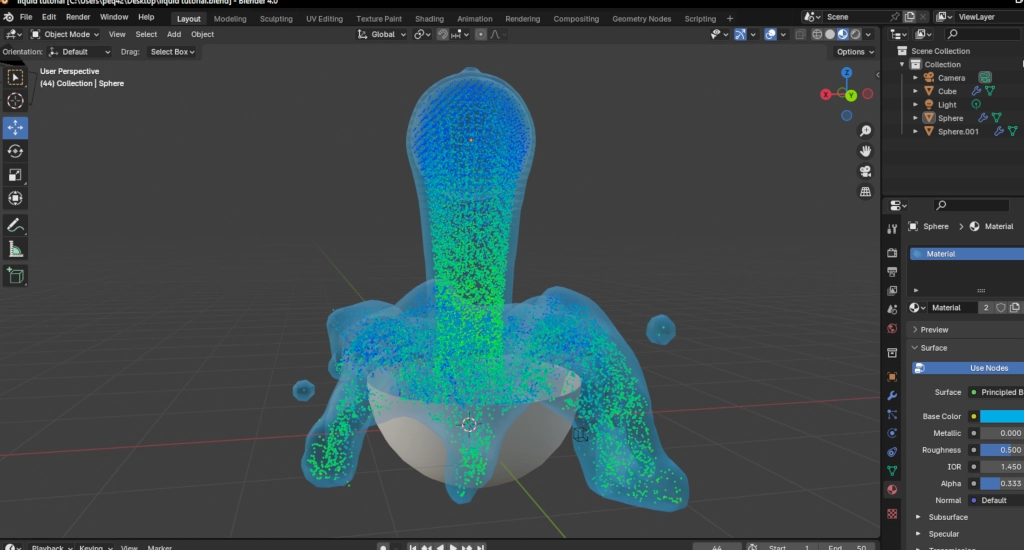
Recently I went back to blender and did a mix of trying to remember what I knew and learning new stuff. Funny enough, when I looked up on google and youtube for any tutorials on Liquid physics simulation and how to make it look realistic, I couldn’t find many tutorials that still worked or had the new Blender interface in mind.
After a bit of research and testing, I ended up finally learning how to do some basic stuff with the systems, so thought I might as well share it.
Getting started
The whole process is super simple. Create a blender project, and that’ll give you a default cube. For the first time in centuries, dont delete the default cube, it’ll actually be used for something later. If you’re working with a complex project, you might want to read my other tutorial on how to make Blender run faster.
Click Add -> Mesh -> Sphere and move it a little left, then do it again and move the new one a little right. On the right sphere, cut the top half off. Your project should look like this:
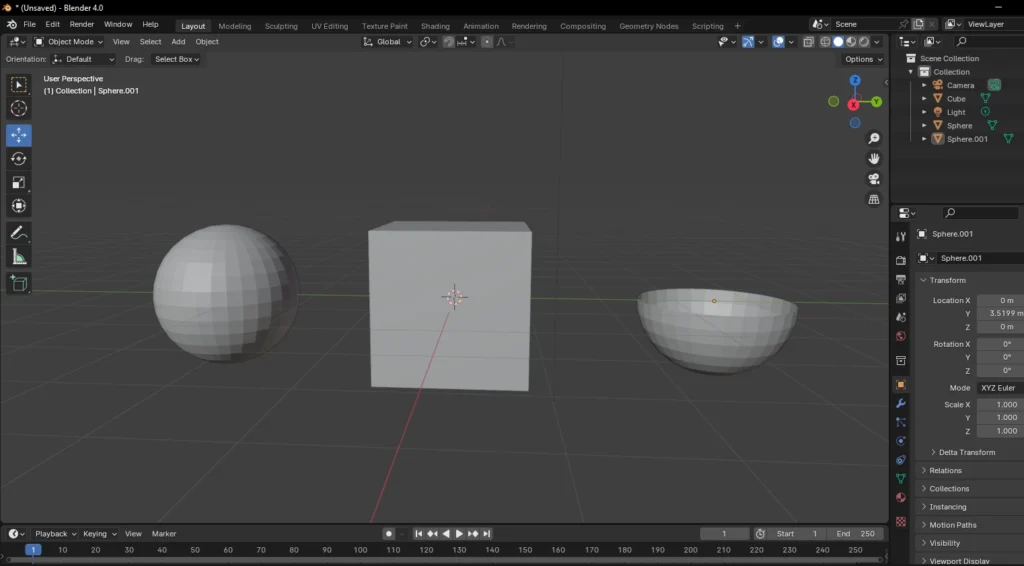
The way fluids work in blender is simple: You’ll have one object turn into liquid(the Cube), one that will emit the liquid(Left sphere) and, optionally, object(s) that can collide with it. Since this is a simple example, I’ll only cover the most basic case where the liquid falls, but it’s obviously possible to make it go up, sideways or in any form you wish.
Simulating
Now the important part. We will setup each object to work according to what I explained previously, then let blender do the physics calculations.
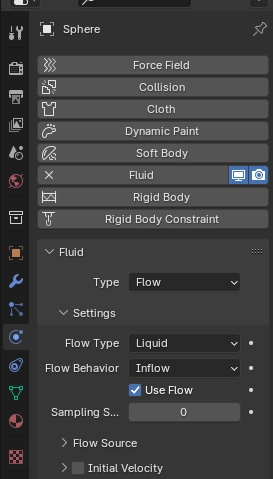
First, the left sphere: Click it in Object Mode, and on the right, click Physics -> Fluid and set it to “Flow“. This will tell blender to emit the liquid from that object. in flow type, select “Liquid” and right below where it says Flow Behavior select “Inflow” so it Adds fluid. The tab should look like this:
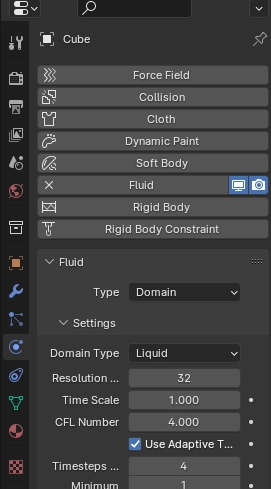
For the cube, first make it bigger, about twice the size. After that, again click Physics -> Fluid but this time set it to Domain. Configure the domain type as “Liquid” and save it. Your tab should look like this:
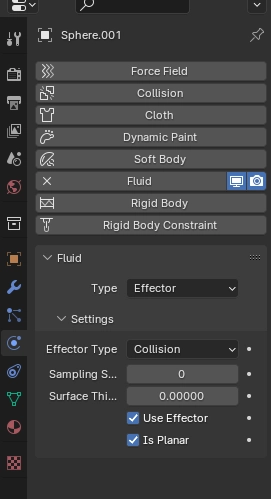
Finally, select the half sphere, or bowl, and within Physics -> Fluid, and enable “Effector” and “is Planar“(because our bowl has no volume). That’s all.
Everything should be set to work as intended. Place the left sphere inside and bowl inside the cube, with the first above the second. Click the Cube again and, inside the Physics tab, scroll all the way down. Mark the “Mesh” box, so blender will use the cube’s mesh to generate the liquid, and in the cache section, change End to 50(This way blender will only bake 50 frames) and Type to “All“.
Press “Bake All” and wait for blender to cook.
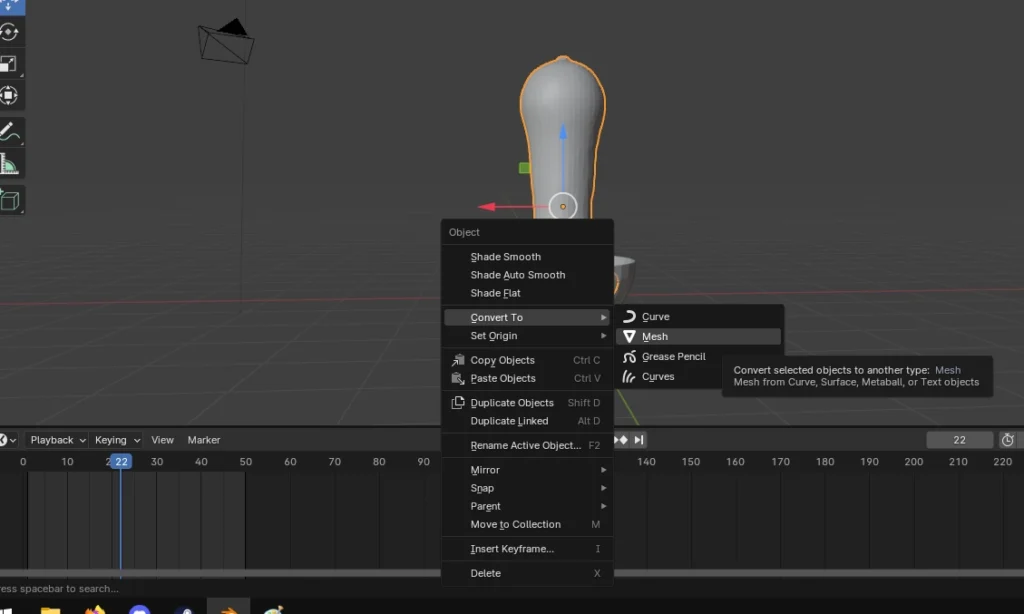
Congratulations! You now have 50 frames of Liquid physics you can select from! You can use any of them by choosing a frame at the bottom then Selecting the liquid -> Right click -> Convert to -> Mesh like this:
If you wish, you can change the liquid’s materials by giving the cube a material, like any normal mesh. If you wish, here’s my project to use as example.

